Author Archives: dsquared

Modern and practical custom bathroom.

Some Awesome, Practical Custom Home Building Ideas

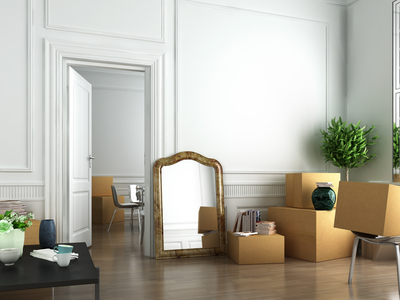
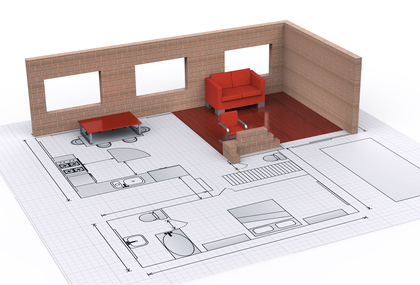
When designing the custom home of your dreams, it is often easy to overlook the absolute necessity of practicality. You may be so overwhelmed with aesthetic ideas that you forget to include important features that will make your home all the more livable for you and your family. Listed below are several tips and tricks that will greatly help to improve the comfort and practicality of your home, while maintaining the visual ideas you have likely grown extremely attached to.

Custom Home Building Ideas for Increased Practicality

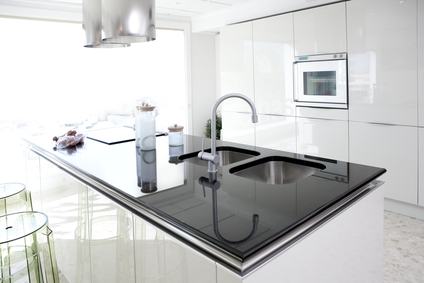
  • Include a second sink in the kitchen

Including a second sink in the kitchen, preferably a full-sized sink, will allow for you to thaw out the turkey while washing the gravy dish, to bathe the baby while soaking the pots, and to move dirty dishes one at a time from the “used pile”, assuring you have plenty of arm room to properly scrub each plate clean. There are many benefits to installing a second sink, do it yourself to discover your own!

  • Magnetic door switches

Installing magnetic door switches will prompt lights to turn on when a door is opened. These are especially great for walk-in closets!

  • Incorporated dirty laundry bins in closets and bathrooms

All too often, you may find the bathroom door unable to fully open due to that sneaky pile of clothing shed before a shower and conveniently forgotten about. Installing a dirty laundry basket underneath the bathroom sink or inside of the closet door can do wonders to help keep the floors clean!

  • A walk-in pantry

Rather than dragging a chair across the kitchen floor every time you need to grab the oregano from the top cabinet shelf, install a walk in pantry complete with sliding footstool or ladder. This is a great special move, and will allow for an extremely ideal hide-and-seek opportunity as well.

  • Bedroom light switches at bedside

This one speaks for itself – how often have you been all but falling asleep while reading your nighttime novel, only to have to stand up and walk all the way to the bedroom door?! Convenience is key with this smart and practical design tip.

  • Valet rods in closet

Not only are valet rods spatially ideal, allowing for much more storage even in limited closet space, but valet rods are inexpensive to install.

  • Ample built-in shoe storage

Add narrow shelves in closets to store your shoes vertically. Shoes can add unnecessary clutter to closets when strewn about the floor. Also, add a small shoe rack by the front door for guests to store wet or dirty shoes upon.

  • In-drawer ironing boards

This will save major space and time – simply install a fold-out ironing board into a dresser drawer or a storage drawer in your closet.

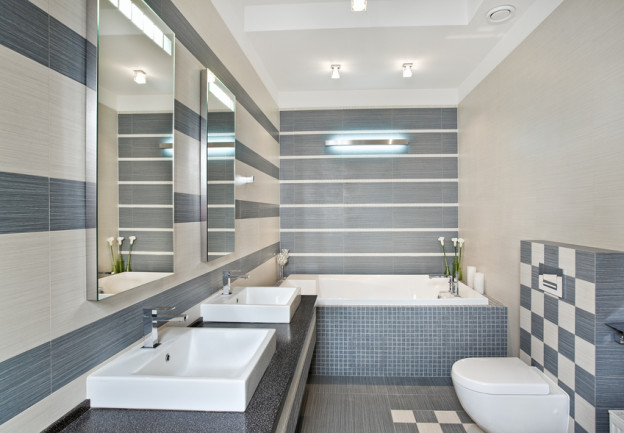
  • Radiant heating in bathroom floors

This is more than a comfort than a practicality – but who doesn’t like stepping out of the shower onto a warm floor? Radiant heating makes the winters more bearable.

  • Swinging laundry room door

Considering the fact that most exit and enter the laundry room with an arm full of clothing, swinging laundry doors are extremely practical and useful.

  • Outlets under cabinets rather than on the wall

Placing outlets under cabinets rather than on the walls will allow for tiling, making the kitchen more cohesive and aesthetically pleasing.

These are only a few of the numerous practicality tips and tricks you can employ to make your custom designed home more livable. For even more ideas, stay tuned for future installments!

Adding texture and color to concrete.

Making Concrete Less Boring – Easier Than You’d Think!

A beautiful home perched atop a mound of crispy dead grass or a pile of weed-ridden and broken up concrete is like a jaw-dropping masterpiece sitting sadly in a termite-eaten, dirty old frame. Once your home has been remodeled, it undeniably deserves to be surrounded by the beauty it so effortlessly exudes. Fortunately, we at CCM happen to expert pavers, and would more than happy to help you fill in your driveway or back patio with a fresh layer of sturdy and easily maintainable concrete. While concrete is a given for many driveways, the reliable material is not as often considered for the backyard. However, because of its low comparative cost, easy upkeep, and extreme durability in every variation of harsh Southern Florida weather, concrete is an absolutely ideal choice for both the back and the front! Yet many homeowners are hesitant to utilize large quantities of concrete in landscaping, seeing as the material has a tendency to come across as somewhat boring. Who wants a drab, gray backyard? Fortunately, there are plenty of ways to make your backyard area beautiful and livable while utilizing the multitude of benefits concrete beholds.

How To Liven Up Concrete in Your Backyard

  1. Look into livening up concrete with color.

Because people are getting fed up with the blasé grayness, many surface-applied coloring options have recently become available. Staining and layering result in natural looking finishes, leaving uneven tone that depicts realistic tile, stone, or brick – depending on what look specifically the homeowner is going for. For more dramatic colors such as cobalt blue, reds, and oranges, polymer-based stains are now available as well.

  1. Top your concrete with a decorative overlay.

Topping your concrete with a decorative overlay is a great way to spruce up existing concrete that may be pitted, discolored or uneven. Overlays are typically a combination of polymer resins, aggregates, and cement, and are applied like a thick paint would be n order to even out the texture and add or smooth out color.

  1. Imprint designs and patterns into concrete, adding texture.

A machine with a sharp blade, about the size of a lawnmower, is used to score patterns into the concrete. Such engraving machines are typically used to cut tile, brick, or cobblestone patterns into the concrete, but can be employed to engrave nearly any desired design. Staining the concrete after it has been engraved will work towards further accenting the material, giving it a new and interesting look and feel.

  1. Expose the aggregate.

This is a cost-efficient way to make concrete far more interesting. In this particular process, beautifully colored natural stones (such as rose quartz, shiny brown river gravel, or red granite) are mixed into the cement before it is laid. The top layer of cement paste is removed once the concrete has been placed, and the stones are revealed. For an even more interesting look, trying adding crushed glass or broken up seashells (great for beach homes) instead of natural stone.

As you can clearly see, there are innumerable ways in which you can spruce up your concrete and reap all of the material’s benefits while not being aesthetically bummed out by a boring and lackluster look.

Interior decorating in a living room.

Interior Decorating Tips For Every Home

No doubt you have heard the expression, “It’s what’s on the inside that counts.” As your premier Southern Florida home contractors, we know that this is far from the whole truth. While the inside of your home is clearly important in both conveying a sense of serenity to those inhabiting it, the outside is equally as significant – and so is the structure, the frame that binds the inside and the out. We will gladly take care of sprucing up the framework of the home you have come to know and love, focusing on perfecting the exterior and the structural support to the best of our ability. The inside, however, particularly in regards to interior decoration, happens to be less our area of expertise. This is where you come into play! In order to complete the beautiful and comprehensive home you have always dreamt of, here are ten interior decorating tips that apply to every home we build or repair.

Make Your Home Beautiful, Inside and Out

  1. Hang artwork at an appropriate height.

Hanging artwork at eyelevel (between 57 and 60 inches from the floor) opens up the room while making the artwork itself accessible to those who choose to admire it. When hanging artwork in rooms with high ceilings, the tendency is to hang the art closer to the top of the wall. Avoid doing this! If you are unsure as to where your artwork looks the best, try taking a photograph – this helps to put the cohesiveness of the entire room into perspective.

  1. Arrange furniture on a rug – the right way.

Leaving some furniture hanging sloppily off of the edge of a rug will detract from the neatness and organization of the entire space. Make sure that you stay consistent when organizing furniture on a rug – all off, all on, or fronts on.

  1. Let go of some “collectibles”.

The sentimentality of some eccentric items may make them difficult to let go of – that’s okay! Simply move them to a different room if they don’t fit in with the theme of the room you’re decorating, or store them safely in a box in the garage or addict to be appreciated at a later date. Minimalism always works better than clutter

  1. Don’t be afraid of boldness.

Incorporate unexpected and statement-making pieces in a conventional setting in order to truly make an impact. It is possible to maintain a sense of cohesion while adding daring interpretive pieces that make statements while still managing to make sense.

  1. Add lighting in layers.

One central lighting fixture will not have the same impact as illuminated artwork, several small lamps, and the intentional lighting of one or two focal points within a given room. Candles will also add some soft lighting, and can be used to illuminate photographs placed on singular shelves… just an idea!

There are numerous ways to liven up your space while remaining tasteful and avoiding clutter. Have fun decorating the inside of your home – and leave the rest to us!

Home building process

Home Building: What You Should Know

Home building can be a very exciting experience for the new home owner. Especially if you have never owned a home before, there is something quite special about knowing that you live in a place you can truly call your own. At the same time, there is no denying the stress that comes along with it. That’s why it is so important to actively prepare for your new home construction.

What You Should Know About Home Building

To minimize stress and maximize your comfort and convenience, here are some essential things you should do before getting your home built.

Budgeting

Every responsible adult will know to “run the numbers” in order to determine their home building budget. However, the trick is to account for all your costs, many of which are hidden. There is the direct cost of construction on the one hand, but on the other hand:

  • Permits
  • Down payments
  • Refunds & savings (from taxes or otherwise)
  • Cost of your estimate (if there is one)

Choosing Your Builder

Next, there is the matter of finding your contractor. This may or may not be as simple as asking your friends and family who they might refer, but you should be mindful of:

  • Whether they are licensed
  • Whether they are insured
  • What their reputation is

Also, it’s never a bad idea to request a look at their portfolio so you can see what they’ve done for yourself.

Consider Going Green

“Going green” with environmentally friendly home design isn’t for everyone, but it should always be considered. Everything from electricity, windows and doors, home insulation, HVAC, utilities, and water usage can all bring huge economic benefits when your house is environmentally friendly and energy efficient.

Remember Your ROI

Is it ever too early to start thinking about resale? We think not. Even if you’re planning on living there forever, you never know how you will fill in the future. That’s why you should always be mindful not only of how much home building costs now, but how much return on investment it will produce down the line.

Wooden deck refinishing

Wooden Deck Refinishing & Cleaning

Do you want your deck to go from looking ordinary to great, or even from great to amazing? If so, this guide on wooden deck refinishing and cleaning is exactly what you need! Wood is the industry leader in outdoor deck design by a significant margin, but its primary drawback is its inevitable warping over time. By taking proper care of it and getting it professionally refinished, you can cut your losses and have your deck looking even better than new!

What You Need to Know About Deck Refinishing

Why refinish your deck? First of all, it will look great. In addition, proper cleaning and refinishing will protect your wood and extend its lifespan. This translates into a fantastic resale value on your home, making deck refinishing one of the top investments for resale.

1. Inspecting Your Deck

The first step is inspecting your deck for any marks, cracks, rots and warping that may have occurred since you installed it. If any boards are loose or you notice any rot that you cannot repair yourself, then hire a contractor to fix or replace these parts of your deck.

2. Preliminary Cleaning

Next, clean your deck with an oxygenated cleaning solution such as DEFY Wood Cleaner. Oxygenated cleaners are preferable to bleach, which don’t actually remove stains per se. In addition, an oxygenated cleaner will remove mildew as well as sun staining.

3. Power Washing Your Deck

The next phase in deck refinishing is power washing (assuming you do not want your deck repainted, which is an entirely separate process that will be addressed in the future). As you go about this, it is extremely important to choose the right pressure (as too much will wreck your deck):

  • For softer lumber materials, a pressure setting of about 500 – 600 psi should be good.
  • Harder wood, such as wood composites, will require more pressure. Adjust your pressure setting accordingly, but go no higher than about 1300 psi.

4. Sanding Your Deck

Power washing will raise the wooden fibers on your deck, which will dry into splinters. For this reason, it is essential that you sand your deck before it completely dries. Using a mechanical, random orbital sander will work best, and be sure to use a grit that is thick enought to penetrate the fibers.

5. Staining Your Deck

The final phase in the deck refinishing process is staining your deck. Browse a home improvement store and ask your contractor for recommendations on choosing both the stain and which brush will work best with your deck. Then, wait 2 days for your deck to thoroughly dry before you apply the staining (as water will prevent the oil-based stain from absorbing properly). Apply the stain evenly, going plank by plank, and voila! You have a refinished deck that looks cleaner and better than it did when you first installed it!

Roof Leak Repair

Roof Leak Repairs & Troubleshooting Tips

Few things in life are more frustrating than roof leaks. And given South Florida’s status as the rain and hurricane capital of the nation, few homeowners have yet to experience this headache. The good news is that roof leak repairs are simple to get through. With the proper guidance, you can troubleshoot your way through almost any leak and fix it on your own.

Roof Leak Repairs 101

There are any number of reasons your roof may be leaking: improper installations, mage that has remained hidden or neglected for too long, etc. Nevertheless, the problem will usually boil down to a single issue in 9 out of 10 cases: flashing.

Flashing & Roof Leak Repairs

For those who are unfamiliar with the term, “flashing” is the primary form of waterproofing roofs. A flashing material (be it aluminum, steel or another metal) is installed in certain areas, such as seams and joints in the roofing, where water naturally flows toward. In so doing, flashing deflects the runoff and prevents leaks. Flashing that is not installed or maintained correctly is usually the prime suspect in a case of a leaking roof.

Troubleshooting Roof Leaks Repairs

You will want to identify the exact source of defective flashing on your roof, which can be any number of the following points.

Chimneys

A prime indication that your chimney’s flashing needs repair is when water stains are concentrated on the ceiling but away from the walls. The problem may be that:

  • The flashing material has been dented or bent
  • The metal has begun to rust
  • Your roof itself may have a loose brick

Roof Valley

As mentioned before, water naturally gravitates toward the vertex of downward sloping planes. If you notice the leak on your ceiling below a valley, then it should be the focus of your roof leak repair. You should make sure the underlayment of your valley’s flashing is properly overlapped by higher flashing (check with the manufacturer for specific measurements). Also, ensure that the underlayment was not installed too closely to the valley itself.

Vents

Some houses also have plumbing vents installed on their roofs. If you do, make sure the vents are properly flashed with rubber or metal. If lack any flashing on your vents, then make sure you hire a professional contractor to install on for you.

Moving In

Tips for Moving In

So, your custom home construction is complete. The last nail is instilled on the wall, and you are about to start the process of moving in. Throughout the whole hustle-and-bustle of the construction process, one thing may have skipped your mind: moving is quite a lot of work! Are you up to the task?

Moving In: Make It Easy

You’ve already exerted untold amounts of energy planning, designing and seeing your brand new house. It can be disillusioning to discover you have another stressful task in front of you when all you want to do is take a relaxing bath in your new luxury bathroom. However, you can save yourself both time and a headache with the following move-in tips.

Packing

Hindsight is 20-20, so make sure you put in the proper legwork before you start moving in. First on the list of suggestions is packing. Be sure to pack your absolute necessities so you’re not scrambling to find them upon arriving. Also, keep track of all valuable items such as jewelry, cash and credit cards. Your list will probably include (among other items):

  • Bedding/linens
  • Clothes (at least a few pairs)
  • Medications
  • Toiletries
  • Tools for unpacking (e.g. boxcutter)
  • Wires and extension cords

Staying Organized

Staying organized is key to moving in. In addition to your packing list, be sure to make a list of all to-do items to take place before, during and after your move. These will include:

  • Canceling or transferring your utilities accounts
  • Changing your mailing address at the post office
  • Changing your billing address with your bank
  • Changing the address on all other accounts (e.g. Amazon, Netflix, etc.)
  • Procuring your security deposit (if applicable)

It’s also an excellent idea to label your packages, which will make unpacking easier. You might even go so far as to label each one’s specific room and use. This way, you can place your “laundry room – shelf” box right there as soon as you walk in the door.

Modern kitchen design

Kitchen Designs Customized for You!

It’s hard to overstate the importance of quality kitchen design in custom home building. Kitchens are and ought to be the focal point of every home. They represent the familial ritual of eating dinner together, and they’re the hub of every party and gathering. Special occasions and holidays host large meals in the kitchen, and it’s the home of many heartwarming memories.

Customizing Your Kitchen Design

Whether you are building your first home or looking for a contractor for kitchen remodeling, you want to get your kitchen design right. Fortunately, there are tools you can use to visualize your kitchen before it’s finished: go to the free Whirlpool® Kitchen Stylist™ Tool to get started!

Style

The first step is designing your kitchen style. Whirlpool® gives you 3 options to choose from:

  1. Classic: Described as “refined and inviting,” classic has a culturally pure feel. It conveys precision while remaining elegant and quaint.
  2. Transitional: Described as “eclectic and creative,” transitional design is the segue from classic to modern. It balances simple and complex textures and fabrics to create scenery that is both practical and appealing.
  3. Modern: Described as “sleek and streamlined,” modern is particularly ornate, emphasizing the function of furnishings to be the most sophisticated design.

Configuration

Next is the configuration of your custom kitchen design. Choose the layout of your kitchen: with all appliances on a single wall, in a 90-degree L-shape, or a three-sided U-shape.

Colors & Finishes

After steps 1 & 2, you will get to customize your wall color, floor color, cabinet finish, and countertop style. Based on the style you have chosen, there will be recommendations for each. For example, a classic kitchen will incorporate traditional cherrywood floors with simple, monochromatic walls and finishes. These options are completely customizable, but remember to be consistent with your colors and finishes!

Appliances

The final stage in kitchen design is what will actually fill the kitchen and give it meaning: appliances. While there is much individual variation here, we recommend the following for choosing your appliances:

  • Smart Kitchens: Home automation has brought on a whole wave of “smart kitchen” appliances that make life in the kitchen much easier. For example, there are automated dishwashers that can schedule washes, and refrigerators that set an energy-saving alarm when open for too long.
  • Placement: Be practical with your placement of things. Keep the dishwasher, sink, prep area, and garbage all close to each other so you’re not walking across the room for one or the other.
  • Energy Efficiency: If energy efficiency is a major concern for you, we recommend you look into Energy Star‘s list of certified appliances.
Outdoor kitchen installation in South Florida

Outdoor Kitchen Installation Ideas

Florida is called the “Sunshine State” for a reason. If you are not soaking up the sun with a brand new outdoor kitchen installation, then you are simply taking South Florida for granted! Installing outdoor kitchens and residential areas is a core part of CCM’s exterior and outdoor paving services, and we have plenty of tips for you to design yours!

Planning Your Outdoor Kitchen Installation

Each outdoor area is different, so there are no rules set in stone. Nevertheless, here are some ideas for you to serve as a jumping-off point.

Flooring

The first piece of outdoor kitchen installation you want to consider is your floor. Because you will be outdoors (and because it rains often in South Florida), you will want floors that are weatherproof (and relatively slip-proof on a wet surface) yet stylish at the same time. So, don’t go with wood. Instead, you will want one of the following:

  • Tile
  • Concrete
  • Brick
  • Natural stone

Of these four, concrete is likely to be the most affordable. However, given the advantages of pavers vs concrete, we prefer natural Tuscany paving stones.

Setting the Atmosphere

When thinking about your outdoor kitchen installation, try to envision what mood/atmosphere you are trying to set. This comprises things such as lighting and heat, among others. As the outdoors are becoming a more popular place to hold parties and spend time with friends and family, more people are installing outdoor heating systems such as heat lamps or fireplaces and fire pits. If you opt to go the latter route, always make sure they are properly installed and in accordance with the law. From there, enjoy sitting around the fire and roasting your marshmallows!

Food & Drink

Finally, no outdoor kitchen installation would be complete without considering what it will actually do: serve as a kitchen-esque setting to eat and drink in. So, you must ask yourself: what exactly will you be doing out there? In addition to tables and chairs, here are some things to think about installing:

  • Wet bar
  • Kegerator
  • Prep station
  • Pizza oven
  • Microwave drawer
  • Pizza oven
  • Electric grill
  • Lobster boiler
  • Wash station
Floorplan for a home addition

Home Additions: Things to Consider

Like anything else in life that is fresh and new, home additions can be incredibly exciting. Whether you live in a model or custom home, there is always more to be done. With this said, it will also be worthwhile to take certain factors into account before you go through with building your addition — there are financial, logistical and practical matters to consider.

Planning & Design

First, you must be specific about what you want in your home addition. You will need to have a good idea of the size and scale of your project for the next step. And, in any case, the remodeling process will go much more smoothly if you are specific about your wants and needs. Here are some suggestions:

  • Your addition should add to and compliment your existing house, not contrast with it. Be consistent not only with size and color, but also with style and overall design.
  • In determining size, it’s a good idea to envision what you will do with your addition once it is completed. Look around your existing rooms and survey their use of space and how they are furnished.
  • Work with a professional architect/contractor. No matter what, there will usually be things you haven’t considered, and it never hurts to get professional advice.

Return on Investment

While no doubt a powerful, visceral experience, you should ultimately be getting the best bang for your buck from home remodeling. Economic conditions pose a major obstacle to getting a proper return on your investment. Unless you are completely willing to bear that cost, you should think twice about building a home addition.

Some things to consider here are:

  • Comparable market values: This is often difficult to ascertain, as no two homes are exactly alike. Nevertheless, do your research and talk to your contractor. Keep in mind that your comparison should control for location and size. Do you know anyone in your area with a home addition of similar scale? How much did it raise the market value of their house?
  • Funding: How you are going to fund your remodeling project is a huge factor to consider. This is important not only for you, but also for the future buyer of your home. How is the market looking right now — what is the prime rate, and what kind of home equity loans are available to you? How does your own mortgage compare to what is currently available?
    • Your Mortgage Rate < Available Mortgage Rates – If you’re paying less interest on your mortgage, consider taking out a home equity loan (assuming your credit is good).
    • Your Mortgage Rate > Available Mortgage Rates – If you’re paying more interest on your mortgage, you should definitely be considering refinancing.

Convenience

Finally, how convenient will this project be for you? All people can be fickle, reneging on something they have already committed to. Don’t be insulted — we are all guilty of it! but make sure you have the time and patience that are necessary to see your project through from start to finish. If you have any big plans or don’t want too much disruption in your house, then you may want to hold off on your home addition (at least temporarily). Don’t worry, though. It will always be there when you want it!