Author Archives: Ryan Miller

Hardwood Floor Installations

Hardwood floor installations are best done by a professional renovation and remodeling service. It’ll save you much time and frustration, not to mention the money spent in repairing damage all-too-often wrought by laypeople when attempting this extensive home renovation project. It’s one of the more difficult projects, requiring weeks’ worth of time and much patience. However, it always pays off.

The Hardwood Floor Installation Process

Why install a hardwood floor? Being that they are much easier to vacuum, mop and clean, there are of course convenience factors to consider. But there is also something homely and old-fashioned about hardwood. It’s a bit nostalgic, and also a great long-term investment. To take just one example: imagine the plummeting resale value of a carpet that’s been stained and scratched by household pets!

Different hardwood floor installation texturesSelecting the Hardwood Floor

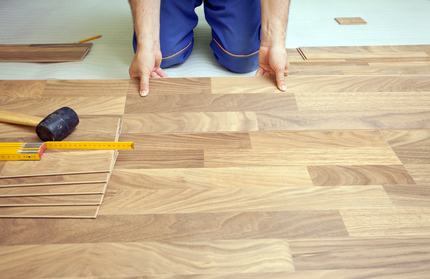
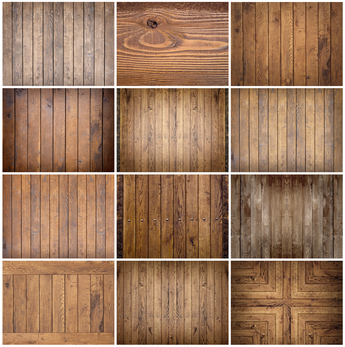
The first step in any hardwood floor installation is choosing  your flooring. There are a variety of different textures (pictured on the left), as well as stain colors, thickness and other options. Keep in mind that:

  1. Thickness depends on how the flooring is installed. Thicker floors are for completely new installations, while thinner ones work well over existing floors.
  2. Color and stain should depend on the lighting and exposure of the room. For instance, solid colors are not recommended in dimly lit areas, where the light will not compliment them.

Preparing for Installation

Next, the room will be measured in order to determine the cut and dimensions of your hardwood floor. Before we proceed, we must also take certain measures against the irritating squeaks and creeks that often accompany hardwood. We clean the sub-floor, fix a substrate on the joists, and install a small barrier between the floor and sub-floor that also prevents moisture from permeating the wood membranes.

Installing the Hardwood Floor

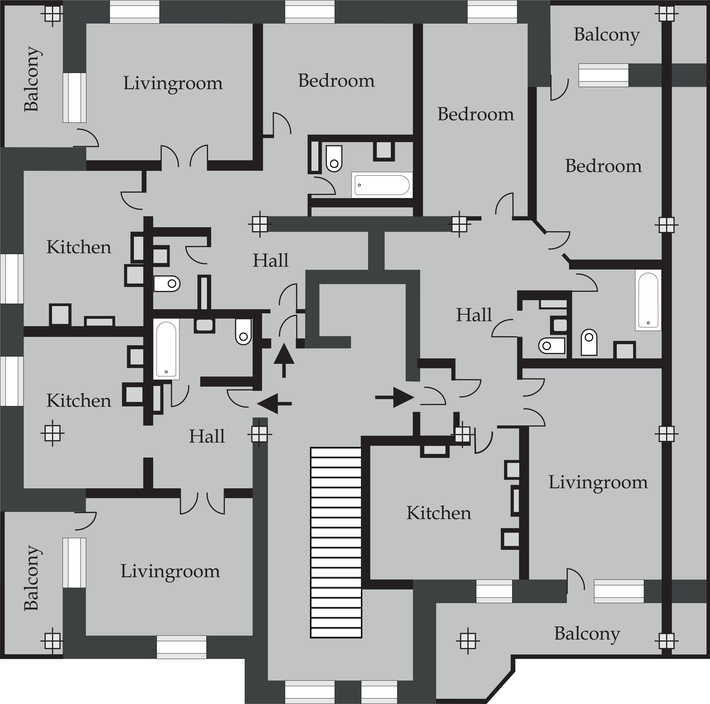
The last thing to be done before a hardwood floor installation is determining the layout. 4 out of 5 times, the floor is installed at a 90° angle to the joists, as the joists provide sturdiness this way. However, there are cases when we are able to install parallel to the joists (especially on the first story or on a ranch floor plan).

We lay several planks as according to the floor layout, starting from the inside and working our way out. This manner of installation is necessary because the last rows of wood will need to be top nailed, which requires pre-drilling and frequently nailing them in by hand. Before we finish, we always make sure to inspect your new hardwood floor installation for any marks or stains and repair them right then and there. We’ll even add some paint or a matching molding just for your pleasure!

HVAC repair and maintenance

HVAC Repair and Maintenance Tips

Heat may not be a top concern in the humid, muggy environment of South Florida, but central air conditioning certainly is! Your central air conditioner’s condensing unit, among other components of your Heating, Ventilation & Air Conditioning (HVAC) system, needs regular care in order to function properly. If you value cool air and comfort in your home, then pay attention to the following HVAC repair and maintenance tips!

How To Repair & Maintain Your HVAC System

Fortunately, there are plenty of HVAC repairs that are easy and can be done on your own. Follow these steps to maintain your condensing unit on at least an annual basis, and call your local home repair service for any other HVAC repair and maintenance you need!

Shut Off the Power

First, you will need to shut off the condensing unit’s power supply. Open the switch box, which should be located next to the unit outside your house. Depending on the make and model of your condensing unit, you will need to do one of the following:

  • Unplug the box
  • Remove the fuse plug
  • Hit the switch that shuts down the power

You should also turn off the main service panel (which you may have repaired when investing for resale) and wait a few minutes to allow the charge to dissipate before moving forward.

Lubricate the Motor

There will be protective grilles on the side that must also be removed. Unscrew the top and side panels and pull the grille away. Do not remove it, but rather support it on top of the fan lightly and carefully. Then, drop some lubricating oil into the ports located above the fan blade.

Clean the Coils

The next phase of HVAC repair and maintenance is cleaning the condenser coils. Be sure not to bend or warp them as you are clearing away any leaves, sticks or dust. Using a soft bristle head attachment, also vacuum the exteriors of the coil fins and also any debris on the bottom of your condensing unit. Use a hose with a gun to lightly wash the inside of the coils.

Finishing Touches

Finally, reposition the grille covers and make sure your unit sits level with the ground. Use a leveling tool and if it is not level, adjust the feet to make it so. Once your unit is level, wait about 3 hours before you turn the power back on. Reconnect the switch and turn on the service panel. Turn your unit to cool — and voila! Cold air for everyone in your house to enjoy!

Prevent weed growth

How to Prevent Weed Growth Between Pavers

If you ave installed paving stones on your driveway, walkway or patio, your pavers already look more magnificent than anyone else’s. Interlocking paving stones have a significant elegance about them, and you will want to keep them looking that way. That’s why it is so important to prevent weed growth between your pavers to ensure they stay flush and appealing.

Preventive Maintenance Against Weed Growth

There is no question that weeds will destroy the appearance of your pavement. You’ve spent the time and money to make your paving stones look better than asphalt and concrete, and the last thing you want is for that to be destroyed by weeds. But this is also a matter of convenience. Removing weeds once they’ve grown is an extremely mind-numbing time-consuming task, so make sure to prevent weed growth from occurring in the first place.

Why Do Weeds Grow Between Pavers?

First, you must understand how this can occur. Weeds are extremely tricky to prevent because they do not grow as most flora do. Wherever there is available soil, seedlings will drop and replicate at an exponential rate. Even if your paving stones were installed by the best paving service available, there will still be crevices that weeds will find to grow.

How to Prevent Weed Growth

When it comes to preventing weed growth between your pavers, the best defense is a good offense. Rid your pavers of weed seedlings before they get a chance to grow by:

  • Regularly taking the time to sweep your pavers (at least once a week), making sure the bristles are deep enough to get between the pavers and in the crevices.
  • Making sure your pavers have a sufficiently declining slope (about 4′ away from your home for every 1″ decline), which will also prevent roof leakage and wet basements.

Dealing With Weed Growth

If you have failed to prevent weed growth between your pavers, fear not — all hope is not lost! Follow these steps to remedy the problem ASAP:

  1. Weed by weed, use your hands to pull and dispose of the larger weeds. Make sure you pull by the roots so they do not grow back.
  2. You can use a pressure washer for the remaining weeds. It is okay to wash away the joint sand as you pressure wash your pavers, but do not erode their bedding layer.
  3. You can use something as commonplace as boiling water or vinegar to destroy the roots and seedlings. However, vinegar may be corrosive, so check your bedding layer material and make sure the solution you are using is okay.
  4. Finally, allow the pavers to dry and refill the joints with sand.
Sale after interior home repair

Interior Home Repair: Investing for Resale

Are you thinking about reselling your home? Whether it’s for now or you are planing ahead, it’s always a smart decision to invest in interior home repair. Practical (rather than aesthetic) remodeling projects demand the highest return on investment, and home repair is no different. It goes without saying that a dilapidated house will turn away potential buyers. Optimism in the housing market notwithstanding, make sure you’ve left nothing defective when you’re preparing your home for resale.

House Sellers’ Guide to Interior Home Repair

Home repair is important regardless of your plans to sell your home. However, putting it on the market should make repairs even more salient. Here are 10 top-priority projects to work on before you nail the “For Sale” sign into the lawn.

Basement

Wet basements are a common problem in rainy, humid South Florida. Make sure your basement is properly insulated and your runoff is far away from your house to prevent any leaks into the downstairs.

Circuit Breaker Safety

Making sure your circuit breaker is (a) correct and (b) properly functioning is not merely a matter of safety, but also law. Ground-Fault Circuit Interrupter (GFCI) outlets, which disconnect unbalanced conductors, are required in all residential bathrooms and kitchen countertops, so make sure you have one.

Drywall

Being one of the most obvious interior home repair concerns, holes or cracks in the wall are seldom unattended to. Nevertheless, it bears mentioning to scour your home for any damaged drywall that potential buyers may notice.

Electric Power Panel

No home inspector worth his or her salt will skip over your house’s electric power panel, so make sure it’s clean, free of broken fuses, etc. You may even want to consider upgrading your panel and factoring it into the resale value.

Garbage Disposals

Garbage disposals pose a major problem if they are not working properly. Even if it is working, make sure your disposal is also clean and there are no foul odors emanating from it. Don’t try to run any thin films (such as potato skins), and clear away grease with a simple vinegar and baking soda solution.

HVAC

With South Florida being as hot and humid as it is, you can be sure that both buyers and inspectors will investigate your air conditioning system. Hot temperature will be the first thing they notice upon entry, so invest the time into this interior home repair immediately.

Paint

Any paint that is cracked, faded, or discolored will greatly reduce the appeal of your home and should be attended to as soon as possible.

Plumbing Leaks

Leaking faucets and fixtures will cause odors and also lead to mold if they are in dark, secluded areas. Since most pipes are within the walls of your home, consider at least getting an inspection by a professional plumber.

Waste Lines

There are also sewage lines that run outside your home: namely, waste lines. Make sure your lets are draining and your septic tank is not leaking. If you have a drain snake on hand, use it to unclog anything that is obstructing the waste lines’ flow.

Water Heater

Lastly, ensure that your water heater is free of any sediment and is properly doing its job. A particularly important task will be replacing the sacrificial node of your water heater, and don’t hesitate to call a professional if you cannot fix your heater on your own.

Modern walk-in closet design

3 Closet Designs for Your Luxury Bedroom

Are you contemplating a new or renovated closet design? Do you know where or how to begin? Don’t accept half-measures! Closets are an extremely important part of the bedroom, providing a unique and personal space for not only clothes, but a wide variety of other things. Make sure your closet is consistent with your style, budget and needs by starting from these simple design templates.

Closet Design 101

While there is much variation between each of them, architects generally begin with a set of 3 designs: walk-in, reach-in and wardrobe. Here is what each of them entails.

Walk-In Closet Design

Wood closetWalk-in closets are relatively new and boast of magnified space and storage capacity. As their name states, these are closets that can be walked into. Their size blends the distinction between room and furniture, as many can be large enough to be considered separate rooms. As pictured on the left, the depth afforded by walk-in closets also allows more flexibility and customization to suit your individual style. Each shelf, drawer and cabinet can serve a distinct utility and purpose. An even more luxurious add-on to consider is an island, which would be installed in the center and allow placement for different outfits, shoes, and jewelry before putting them on.

Reach-In Closet Design

the “original closet,” reach-ins are not deep enough to be walked into (being generally about 2 feet deep), and their widths vary according to the size and shape of the room. While walk-ins are generally considered the more upscale option, there is considerable convenience that only comes with a reach-in. Less space actually means less things get lost, and there is no denying the ease with which items in such closets can be obtained. For those that do desire more space with a reach-in, multiple shelves and door hangers may be installed.

Wardrobe Closet Design

wooden wardrobePictured on the right, wardrobes come from an age before proper closets ever existed. They are essentially furnishings that serve as closets, and they are distinct by existing as freestanding rather than fixed storage units. Their relatively small size allows for compact, convenient storage in rooms in which other closets would be otherwise unavailable. They come in a variety of styles, materials and colors, so you can always be sure you will find one that perfectly suits your needs.

Home improvement tips

Live Like a KING (For Under $5,000!)

You don’t have to be sitting on a pile of gold to live like a king! Enjoy a life that feels like true royalty with these simple home improvement projects — each of which adds a hint of luxury to your house without putting so much as a dent in your wallet! The grand total of them all won’t add up to more than $5,000, but it’s the comfort and elegance that they provide that is truly priceless.

How to Live Like a King For Under $5,000Home improvement infographic

Home Office/Study

  • Lounge Chair: After a hard day of work, take a load off in your comfy lounge chair.
  • Desk Organizer: Luxury is as much about clarity as it is comfort, and nothing clears the mind like a well-organized office. Think about it — what is less luxurious than fretting about where you put that important document!?
  • Accordion Task Lamp: Whether you’re reading a book in your lounge chair or filing something in your desk, making sure your space is well-lit is key.

Bedroom

  • Egyptian Cotton: For years, Egyptian cotton has been synonymous with comfort and luxury. Enjoy it in your room, often for as cheap as $150 for a 1200 thread count!
  • High Thread Pillows: Also be sure to keep your pillow thread count high. Anything below 1000 is unacceptable!
  • Vintage Nightstand: If you’re feeling extra groovy, spice up the bedroom with a flashy nightstand, as well.

Bathroom

  • High Efficiency Toilet: Get one of these installed and save big on your energy bill for all time to come!
  • Gooseneck Shower Head: Why gooseneck? Because nothing else makes you actually feel like there is a waterfall smoothly rinsing over your hair as you take a bubble bath!
  • Heated Towel Rack: Step out of the shower and feel the warm embrace of towels that have been pre-heated for your comfort!

Foyer

  • Vanity: There’s nothing wrong with getting a little self-indulgent…especially when emulating royalty. So indulge on as you catch a glimpse of yourself in the mirror ever morning!
  • Raincoat Wardrobe: Why track rain all throughout your newly improved home? Leave the elements where they belong: in your raincoat wardrobe and OFF your carpet!

Lounge

  • Home Theater: Enjoy surround sound in the comfort of your living room and you will truly feel like you have a front seat in the king’s court!
  • Love Seat: Plush pillows and smooth furniture are bound to make even the most mundane activities more comfortable…and more importantly, more enjoyable.
  • Ottoman: What would a love seat be without an ottoman to prop your feet on? Lay down, relax, and enjoy!

Kitchen

  • Kitchen Island: Doubt the capacity of a kitchen to provide comfort and luxury? You’ll think again when you experience what it’s like to dine on high from an island.
  • New Storage: Eliminate or even prevent clutter with new and improved cabinets, racks and drawers that will provide you with a place for anything.
  • Sub-Cabinet Lighting: Why cook in the dark? Sub-cabinet lighting ensures that you be marveling at everything in front of you!
Modern bathroom design

Bathroom Design Tips & Ideas

Whether you are remodeling, adding an addition or having your custom home built from scratch, it is important not to neglect bathroom design! While neither as exciting nor as conspicuous as your kitchen design, bathrooms are nevertheless quite personal. Adding a touch of luxury and designing one consistent with your own style and personal taste can go a long way.

Designing Your Bathroom: Where to Start

As is the case with most architecture and design processes, your bathroom is best imagined as a whole rather than as a sum of its constituent parts. In other words, think of your entire bathroom design instead of your shower, then your toilet, then your fixtures, etc. Below, you will find 3 design ideas in their entirety, as well as their look, feel, style, and indications as to whether they are right for you.

“Rustic” Bathroom Design

If you are looking for a bathroom that is both simple and charming on the one hand, while also cozy and familiar on the other, then this design is right for you. “Rustic” (or “country”) bathrooms have an overall old-fashioned style about them, incorporating:

  • Fixtures made of natural wood and/or stone
  • Waste baskets made of wicker
  • Wooden cabinets

Color schemes used here range from dark orange to brown, and they are best complimented by a bathroom rich with natural light. So, consider this especially if your bathroom is flooded with sunlight and makes generous use of windows.

“Traditional” Bathroom Design

Where rustic bathrooms are old-fashioned in the sense that they have a sense of familiarity, traditional ones are old-fashioned in their elegance. This design is distinctly European in its aura, and heavily emanates nostalgia. It is more generous and perhaps ostentatious in appearance, using:

  • Brass faucets, knobs and shower heads
  • Oval-shaped mirrors/vanity mirrors
  • Porcelain tiles and tubs

It is not uncommon to decorate such a bathroom with wallpaper, as well as floral ornaments. There is no definite color scheme, but light, simple colors are recommended

“Modern” Bathroom Design

Finally, modern bathrooms have a distinctly “sleek” and “smooth” feel about them, with their:

  • Stone (marble or granite) countertops and tiles
  • Stainless steel knobs and sinks

Generally, color is used to accent certain focal points in the bathroom such as the sink, shower and/or bath. Countertops and/or floors may be dark, gray or black, but they are contrasted by the light colors used on the floor and wall. It is also common to add wall art for decoration, but the design is otherwise minimal ornamentation and a rather simplistic.

Outdoor deck design using wood veneer

Outdoor Deck Design: Materials to Choose From

Decks are a core part of South Florida living, whether you are enjoying the cool, salty breeze from your custom-built beach house or soaking up the sunlight in your backyard. When it comes to outdoor deck design, one of the most significant choices you make will be material. How is the material going to look? Will it match the rest of your house? Is it weatherproof and durable? What’s the effect on your home’s resale value?

Choosing a Material for Outdoor Deck Design

By all appearances, wood seems to be the only material to choose from. However, there are many different varieties of wood, as well as vinyl that can be made to look like wood. Here are some of the options we recommend when we design and construct decks for our clients, whether built from scratch or part of a home addition.

Vinyl

Like vinyl that is used for siding, deck vinyl can be finished either with wood veneer or finishing that is barely distinguishable from wood. Consider vinyl for these following benefits:

  • Variety of different colors and styling options
  • Easily cleanable
  • Durable & fade-resistant

Lumber

As stated above, wood is by far the industry leader in outdoor deck design. You can use pine or cedar, as well as a composite, or even choose from a few more upscale, exotic options. Though wood is quite durable — even more so if pressure-treated — its one drawback is its susceptibility to “warping,” in which it bends due to chronic stress.

Cedar

Cedar is also highly durable. It is mostly known for being considered the most versatile of deck-building materials, able to blend easily into any architecture

Pine

Pine is the most popular wood material. It is often not only the cheapest material, but also the most cost-effective, as u save money both at the point of purchase as well as over time from maintenance or the need for replacement.

Wood Composite

Wood composite can be made from a number of combinations of lumber, other woods and vinyl. Combining the durability of vinyl with the aesthetic advantage of lumber wood, wood composite has the advantage of not warping or splitting. At the same time, it provides the exact same appearance as wood, and is barely distinguishable from it.

Floor Plans for the South Florida Custom Home Owner

Choosing a floor plan is an exciting part of the custom home construction and design process. It is here that we truly begin to customize your house and everything in it to your individual needs. There’s an appropriate floor plan for nearly every South Florida home owner, from retirees to the inhabitants of a luxury beach house. Which is the one that is right for you?

4 Custom Home Floor Plans

While each can be tailored and customized on an individual basis, these plans generally come in 4 forms…

Ranch floor planThe Ranch Floor Plan

Ranches come in different shapes and sizes, but they all have one thing in common: a single floor. To the left you will see a rather small ranch that outlines where each room is. What might be called “functional rooms” (kitchen, living room, office, etc.) are usually located on one side, while “residential” ones (bathroom and bedrooms) are on another. A master bedroom, when there is one, usually has its own proper wing in the house.

The 1.5 Story Floor Plan

Also known as a “1-1/2 story,” “farm ranch,” or “cape cod ranch,” these plans are a rarity but may be highly sought after by opulent bachelors, young newlyweds and the like. They are essentially minimized ranches with a master suite on the first floor and then secondary bedrooms (i.e. guest bedrooms) on the second.

Two story floor planThe Two Story Floor Plan

Two story houses are more of a commonality today and will generally comprise a living area with bathrooms, laundry room, kitchen, and living room on the first floor. All bedrooms, including the master bedroom, are located on the second floor. Two story homes are highly versatile and, as pictured on the right, can include multiple rooms that are identical in form but very different in function. Each “living room” can be different, with one housing a TV and entertainment center, another being a study or office, and yet another a billiard room.

The Multi-Level Floor Plan

The multi-level home is less of a proper design than it is an umbrella term for homes that comprise more than two stories. They include:

  • Split-Level/Foyer – Split-level or split-foyer homes are made up of a small middle story that incorporates the foyer, but usually nothing else. Rather, the foyer sits at the center between a lower and upper level, with the upper level housing all bedrooms and the lower one housing the kitchen and living rooms.
  • High Ranch – High ranch floor plans are generally identical to ranches except they incorporate a smaller lower level which isn’t a proper story, but still more than a ranch. These floors usually house the garage as well as a lower living room, which are apposite to houses that sit on steeply sloping hills and declines.
  • Tri-Level Homes – Tri-levels house 3 or more stories, usually with the master bedroom or suite taking up an entire floor on its own. The lower levels include smaller bedrooms, living rooms, half baths, and the kitchen.