Tag Archives: paving stones

Prevent weed growth

How to Prevent Weed Growth Between Pavers

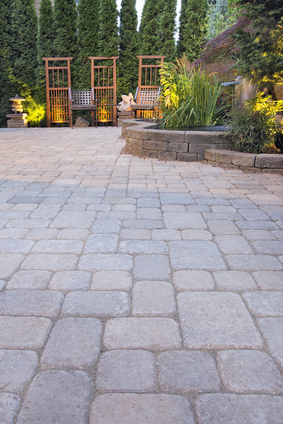
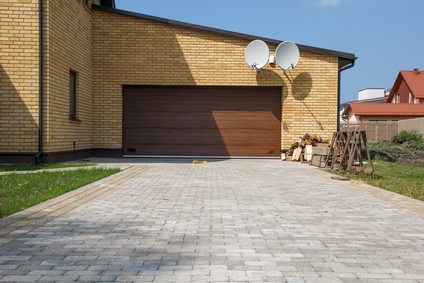
If you ave installed paving stones on your driveway, walkway or patio, your pavers already look more magnificent than anyone else’s. Interlocking paving stones have a significant elegance about them, and you will want to keep them looking that way. That’s why it is so important to prevent weed growth between your pavers to ensure they stay flush and appealing.

Preventive Maintenance Against Weed Growth

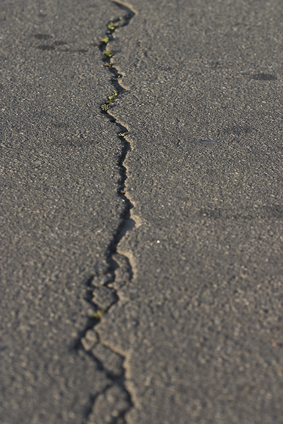
There is no question that weeds will destroy the appearance of your pavement. You’ve spent the time and money to make your paving stones look better than asphalt and concrete, and the last thing you want is for that to be destroyed by weeds. But this is also a matter of convenience. Removing weeds once they’ve grown is an extremely mind-numbing time-consuming task, so make sure to prevent weed growth from occurring in the first place.

Why Do Weeds Grow Between Pavers?

First, you must understand how this can occur. Weeds are extremely tricky to prevent because they do not grow as most flora do. Wherever there is available soil, seedlings will drop and replicate at an exponential rate. Even if your paving stones were installed by the best paving service available, there will still be crevices that weeds will find to grow.

How to Prevent Weed Growth

When it comes to preventing weed growth between your pavers, the best defense is a good offense. Rid your pavers of weed seedlings before they get a chance to grow by:

  • Regularly taking the time to sweep your pavers (at least once a week), making sure the bristles are deep enough to get between the pavers and in the crevices.
  • Making sure your pavers have a sufficiently declining slope (about 4′ away from your home for every 1″ decline), which will also prevent roof leakage and wet basements.

Dealing With Weed Growth

If you have failed to prevent weed growth between your pavers, fear not — all hope is not lost! Follow these steps to remedy the problem ASAP:

  1. Weed by weed, use your hands to pull and dispose of the larger weeds. Make sure you pull by the roots so they do not grow back.
  2. You can use a pressure washer for the remaining weeds. It is okay to wash away the joint sand as you pressure wash your pavers, but do not erode their bedding layer.
  3. You can use something as commonplace as boiling water or vinegar to destroy the roots and seedlings. However, vinegar may be corrosive, so check your bedding layer material and make sure the solution you are using is okay.
  4. Finally, allow the pavers to dry and refill the joints with sand.
Installing paving stones on concrete

How to Install Paving Stones on Concrete

How to Install Paving Stones on Concrete

There is no doubt that, when it comes to custom paving in South Florida, paving stones reign supreme over both asphalt and concrete. However, you don’t have to rule out either of these materials completely. You can install paving stones on concrete, and here’s your guide on how to do it.

Why You Should Install Paving Stones on Concrete

On its own, concrete may be inferior to pavement hardscapes. However, it can actually provide a surface that is remarkably stable when paving stones are installed over it. In fact, it is much more stable than installing paving stones over asphalt. This benefits you as a homeowner. Pavers remain stable for much longer, meaning you won’t have to replace them.

What You Will Need

  • Concrete padding
  • Bucket (about 10 quarts’ volume)
  • Mortar
  • Water
  • Trowel (preferably one that has margins/notches)
  • Paving stones
  • Rubber mallet
  • Dry cement
  • Cement sand
  • Broom

Step-By Step Instructions

  1. To install paving stones on concrete, first lay them on your concrete padding.
  2. In a bucket, mix your mortar with water until it becomes nice and thick.
  3. Use your trowel to spread a 0.25″ deep mixture on the padding, using the dimensions of your paving stones as a guideline.
  4. Starting in one corner, start to lay the pavers down. As you install each paving stone, make sure it is flush — both front to back and side to side.
  5. Pour dry cement beginning at the center and moving outward. Make sure this is a thin depth, about 0.25″ which will raise the central pavers to be level with the ones on the edge.
  6. Begin placing paving stones on the other corner, installing them the same way as in step #4.
  7. Secure the paving stones by tapping them with your mallet. Make sure they are all at a level depth.
  8. The last step to install paving stones on concrete is sprinkling concrete sand over the entire paving structure. Brush the sand off the stones themselves and into the crevices to make sure there is no excess.
Make your house stand out like this one!

3 Ways to Make Your House Stand Out

In a dull, boring black-and-white world, you want to fill your house with vibrant colors — in other words, you want to make your house stand out. No one wants to be a part of the “Stepford” community where everything looks the same. For many people, one single house is all they get in life. So make it different — make it count!

How to Make Your House Stand Out

You don’t have to be a professional designer or landscape architect to do this. All you need is ideas, and herein the possibilities are endless. Here are 3 jumping-off points for you to get started.

Paving Stones

Let’s start with the outside: your driveway and the path leading up to your house. Here, custom paving stones offer you a tremendous opportunity to make your house stand out. Both concrete and asphalt are banal. Moreover, paving stones can be customized to your exact wants and wishes. What pattern do you want them installed in? What color or colors do you desire? Pavers are guaranteed to add value and beauty, plus they are crack-resistant and last for a lifetime!

Landscape & Gardening

Another outside feature all too often neglected is the landscape. Here, too, the possibilities of a custom design are almost without limit. If your front lawn boasts only a few trees and shrubs, consider the following:

  • Natural garden stones to create a unique focal point for your landscape
  • Retaining walls to segment your gardens and trees
  • A coy pond and bridge for an extra hint of luxury

Blur the Line Between Inside & Out

In most houses, the demarcation between inside and out is fairly clear. You can make your house stand out by blurring these lines a bit, installing a courtyard, arcade, or open air patio complete with uniquely designed columns and arches. The Sunshine State is made to be spent outdoors, and these components are all part of the rich tradition of South Florida luxury homes.

Showing how to install interlocking paving stones

How To Install Interlocking Paving Stones

If you find yourself wondering how to install interlocking paving stones, there is good news for you: this is a project that can be done DIY, using only a few simple tools and a day of hard work. Here’s how to do it.

How to Install Interlocking Paving Stones

To go about this process, you will need the following materials:

  • Paint (for landscaping purposes)
  • Shovel
  • Tamper or compactor machine
  • Mesh screen
  • Edging material
  • Hammer
  • Sand for bedding
  • Paver sealant
  • Measuring tape
  • Gravel
  • Rubber mallet

Step 1: Clearing the Area

First , you will obviously have to choose which paving stones you want to work with. It’s also a good idea to take measurements while you go shopping. Then, demarcate the area to dig up with landscape paint.

Excavate the existing soil using a shovel. You may want to consider investing in a tiller if you find the soil to be too hard to dig up. Dig about 8 inches deep, as this is the “frost line” below which frost will not damage your pavement.

Step 2: Edging

Next, tamp the floor to soften up the moisture. Then, lay some mesh screening over the surface you’ve dug up. This will prevent weeds from growing in your area.

You will need to install some edging, which can be made of anything from plastic to brick or stone. This will preserve your paving area (for post-paving) while also clearly marking the area you want to pave (during the process) as your landscape paint may erode.

Step 3: Laying the Foundation

Lay your foundation of gravel. Every 4 feet from your home, slope the gravel about 1 inch. This will direct drainage away from your house’s foundation. Then, spread about 2 inches of sand over the gravel smoothly and evenly.

Step 4: Installing the Paving Stones

Finally, install interlocking paving stones over the bedding of sand. Start in a corner and fit the stones in their desired pattern from there. You may need to readjust the bedding as you go, removing even a few grains of sand so the stones are nice, flush and even. Seal the stones in place with some paving sealant, then hammer them in . Continue this process and voila — you have a brand new pavement walkway installed!

Installing paving stones over asphalt

Can You Install Paving Stones Over Asphalt?

When it comes to custom paving in South Florida, there is no doubt that paving stones reign supreme. The advantages of paving stones vs. asphalt are many: asphalt cracks, melts and retains a hot surface temperature. This is why so many South Florida homeowners choose interlocking stone installation from inception. Yet, what about homeowners who have already paved their driveway with asphalt? Can they install paving stones over the existing asphalt?

Should You Install Pavers Over Asphalt?

The answer is yes, you can install pavers over asphalt. But should you? It is debatable. In South Florida, warranties for paving stones over asphalt are rare because of the hot temperature, which may cause the asphalt to melt.

How To Install Paving Stones Over Asphalt

Yet, installing pavers over your existing asphalt driveway is still better than removing the asphalt and starting from square one. This can be timely and expensive, as you will need to:

  • Check with your local government’s regulations for asphalt disposal
  • Jackhammer the asphalt bit by bit to break it up
  • Shovel each piece of asphalt into a wheelbarrow to dispose of it

So, it is often easier to simply install paving stones over asphalt. This process is not much different than the normal procedure for custom paving in South Florida. Here is what we do:

  1. Repair and cracks, divots, etc to make sure the asphalt is in as good and level a condition as possible.
  2. Since your driveway will need to sustain a larger weight for vehicles, we install a 1” class II base of bedding sand with a depth of 4”.
  3. Place a board around the perimeter of your driveway.
  4. Use a plate vibrator to force the paving stones into the sand bedding and push the sand up between the stones to interlock them.

Voila — you have installed paving stones over asphalt, killing two birds with one stone in the process. On the one hand, you’ve saved yourself the time and headache of removing asphalt from your driveway. To boot, you’ve also installed paving stones, an infinitely more attractive and aesthetic custom paving arrangement.

South Florida custom paving with paving stones

South Florida Custom Paving: Pavers vs. Concrete

South Florida custom paving is all about you — what we can do for your driveway, walkway or patio? At CCM, experience has taught us one thing about customer service: custom paving isn’t simply about short-term benefits such as up-front cost and aesthetics. It’s also about giving you pavement hardscapes that will add value and beauty for a lifetime.

Why We Use Pavers for South Florida Custom Paving

For this reason, we use paver hardscapes for our custom paving services. We have over two decades of experience in the South Florida custom paving industry which gives us the expertise to know which paving materials provide superior quality. Let’s have a look at how our custom paver stones compare to concrete alternatives.

Custom Paving With Concrete

Along with asphalt, concrete is one of the most popular methods used in South Florida custom paving. It’s also one of the materials that has been in use the longest. Here are the advantages and disadvantages of using concrete:

Advantages of Paving With Concrete

It’s low cost per square foot makes concrete one of the cheapest options for South Florida custom paving. In addition, it has the advantage of familiarity and traditional paving appearance.

Disadvantages of Paving With Concrete

Concrete in South Florida custom paving example

Concrete will inevitably crack, which makes it a poor long-term choice for a South Florida custom paving project.

However, concrete is prone to cracking. There are multiple reasons it may crack, such as:

  • Heavy loads (such as large cars)
  • Concrete shrinks
  • Weather/changes in temperature causes expansion and contraction

The constant cracking of concrete is even more problematic for South Florida custom paving jobs because cracks occur at random. This requires multiple repairs at any given time, which makes it extremely difficult to preserve a uniform paving style and color.

Custom Paving With Stamped Concrete

Stamped concrete is a newer and more aesthetic material that has become popular in South Florida custom paving. “Stamping” concrete refers to texturing or forming it into a pattern that less resembles concrete and more resembles bricks, stones, etc.

Advantages of Paving With Stamped Concrete

The primary advantage of stamped concrete is that it doesn’t look like concrete, which is often considered unattractive. This makes it not only better looking, but a more customizable option for South Florida custom paving.

Disadvantages of Paving With Stamped Concrete

As odd as it may seem, the benefits of concrete pavers lead to even more disadvantages than regular concrete. They are still prone to cracking, but it is even harder to patch the cracks while still maintaining color and style. This creates with irregularities in the concrete which are even less attractive than the patches and repairs in concrete.

Why Choose Custom Pavers for Your South Florida Custom Paving?

With custom pavers (a.k.a. paving stones), you get none of the problems with cracking and repairs that concrete and stamped concrete cause. Pavers are individual stones, which creates natural linkages and makes them less prone to cracking due to weather. They also provide these extra advantages:

  • Lifetime guarantee backed by warranty.
  • No wait after installation (unlike concrete, which must wait 3-5 days).
  • More customized appearance.
  • Extremely strong and durable.
  • If repairs are needed, individual stones can be replaced. This eliminates ugly cracks and patches.

Call Complete Construction & Management for premier South Florida custom paving, using only the finest custom pavers! Call 561-436-3679 today!

CCM uses pavers for custom paving in South Florida

Custom Paving in South Florida: Asphalt vs. Pavers

Custom paving in South Florida isn’t just a matter of pavers vs. concrete. Another popular option is asphalt. It is similar to concrete and stamped concrete in a number of ways. Both concrete and asphalt are poured and flattened, whereas custom pavers are installed. Asphalt and concrete are also considered cheaper options for custom paving in South Florida.

Custom Paving in South Florida: Asphalt vs. Pavers

There are both advantages and disadvantages of using asphalt for custom paving in South Florida. However, we think that CCM’s custom pavers make for a better overall paving experience. Here are the reasons why.

Advantages of Custom Paving With Asphalt

  • Inexpensive
  • Restricts buildup of dust
  • Can pave over and be paved over
  • Efficient water drainage
  • Unaffected by ice*

*Asphalt’s immunity to ice build up is a principal advantage over concrete, which will crack when ice thaws. However, for such hot climates it is not relevant to custom paving in South Florida.

Disadvantages of Custom Paving With Asphalt

Despite its cheapness and other advantages, asphalt does not compare to the value the pavers we use for custom paving in South Florida. Appearance and surface quality are two of the many areas where custom pavers outshine asphalt.

Appearance

cracking makes asphalt an unattractive choice for custom paving in South Florida

Like concrete, asphalt will inevitably crack over time.

Asphalt is poured to create a smooth, black surface. This immediately makes it seem unattractive for luxury homes in South Florida. Even if homeowners can get past the plain appearance, it’s important to realize that asphalt will not remain that way. Like concrete, it will crack over time.

Surface

There are also two features that make asphalt particularly unappealing for custom paving in South Florida:

  1. Melting
  2. Surface temperature

Asphalt is extremely temperature-sensitive, as anyone who has stepped barefoot onto a blacktop will undoubtedly attest to.

Why We Use Pavers for Custom Paving in South Florida

Only stone pavers provide true style and elegance for custom paving in South Florida luxury homes. Whereas asphalt looks plain, custom pavers are made to look customized and extremely intricate. They also last for a lifetime, forever adding to the value of your house. They come in different sizes, shapes and colors, which allows CCM to really put the custom in custom paving.

For the best custom paving in South Florida, call Complete Construction & Management at 561-436-3679 today!